If you love exact measurements, tried and true recipes, and certainty of success...go away...this blog is not for you.

Sunday, March 3, 2013

Savory Pastry Tart with Fruit, Almonds, and Brie


This is my friend, Valerie. She has no idea that I just stole this picture from her Facebook page and I have no intention of telling her. Valerie is one of my favorite cooking cohorts for several reasons:
1. She lets me completely take over her kitchen and offers me ingredients I would never have on hand at my own house.
2. She pretends to like everything I make--even stuff with spinach in it.
3. She's an amazing conversationalist with good ideas, intelligent replies, and her own point of view. And she's not afraid to tell me when she disagrees with me, which always makes life better.
4. She is incredibly adventurous when it comes to making food and often celebrates successes and failures with a Facebook post.

Why is she at the top of my recipe? 

One day when I was visiting the Amazing Valerie, she showed me a recipe she wanted to make. It had chunks of brie, caramelized sliced onions, and sliced apple, and pomegranate seeds, wrapped in puff pastry. The top was brushed with an egg wash and was golden and crusty. It looked heavenly. So we made it. And we followed the recipe exactly.

The finished product was good...but that was all. It wasn't stupendous or mouth-watering or to-die-for, at all. And we were a bit disappointed. So (as is our custom) we sat at the kitchen counter and dreamed of ways to make the tart better, and as we chatted, we dipped leftover apple slices in balsamic vinegar--and suddenly we were inspired to make this new, improved version which is definitely stupendous and mouth-watering. 

See why Val is one of my favorite cooking people?

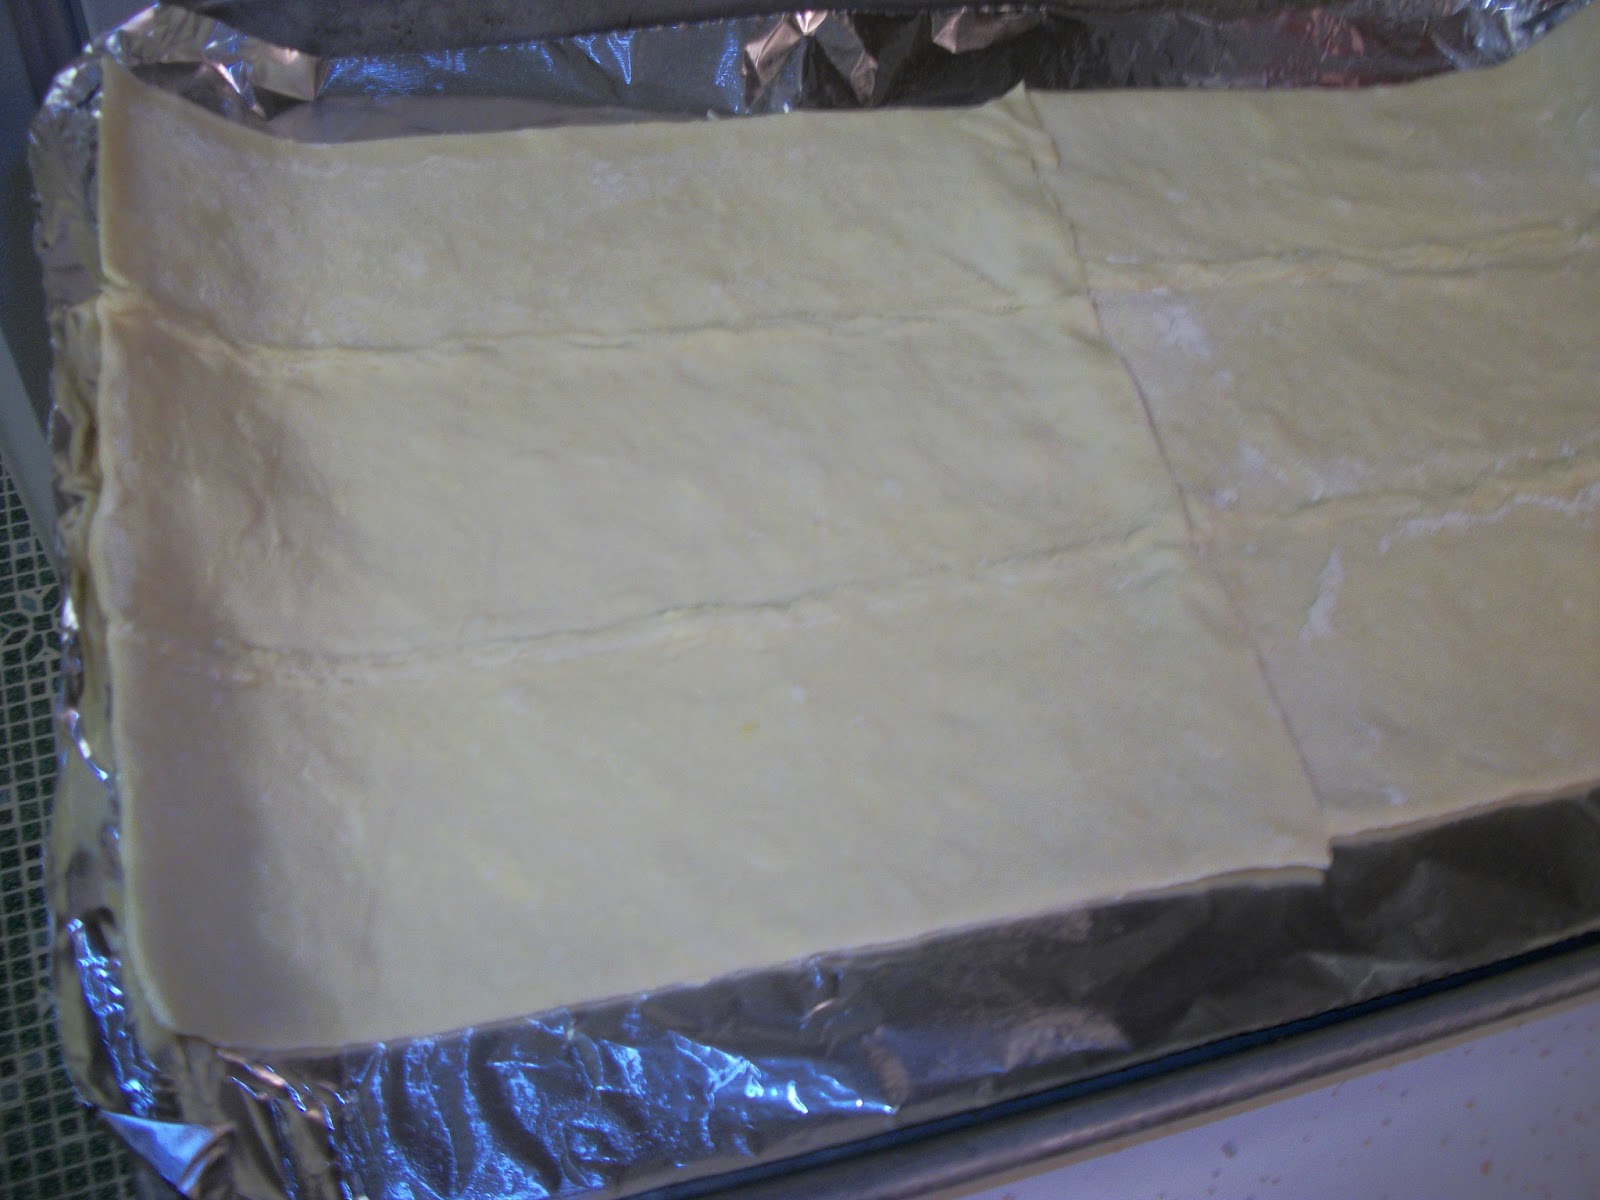
Preheat the to 425 degrees. Then roll out two sheets of thawed puff pastry dough onto a baking sheet (this is on foil, but I prefer using parchment paper), overlapping the ends in the middle and pressing them together as shown. The edges of the pastry will extend up the sides of the pan--that's the way it should be.

Thinly slice an apple and a pear, sprinkle lightly with salt and immerse in about 1/4 cup of balsamic vinegar. We like to use red pears and honey crisp apples. This time we used a Granny Smith apple and an Anjou pear. Also, this will make way too much fruit filling, so feel free to snack on these.
 

Toast slivered almonds until they're golden brown.
Slice an onion and caramelize it in 2 tsp olive oil and 2 tsp butter (oops--no picture) and remove the seeds from one pomegranate. Aaron has a really cool tool that does this. No one else in the family has figured out how to use it. I've heard you can remove the seeds easily if you do it while they're submerged in cold water, but again, I've never tried that method either. Thankfully, we had Aaron with us when we made this. You can borrow him and his pomegranate tool if you book in advance.


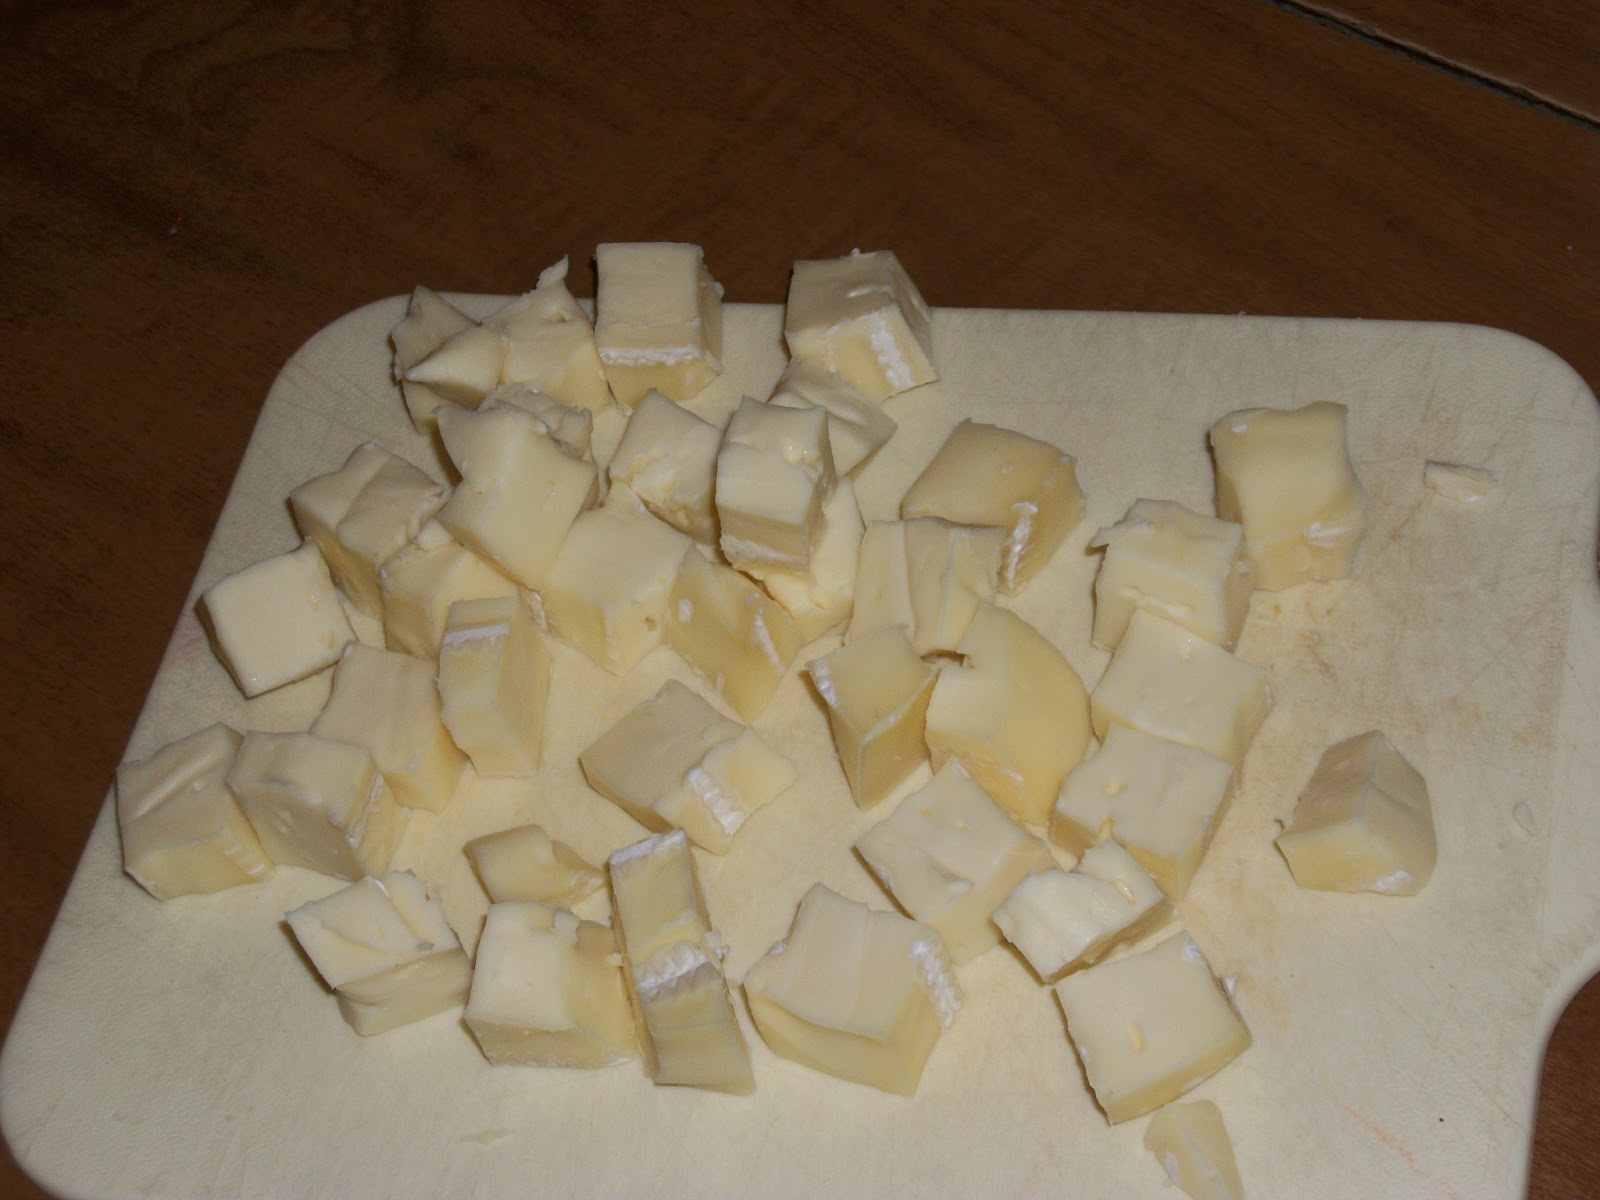
Cut 8 ounces of brie cheese into cubes.


Spread the fillings on the puff pastry sheet in this order:
1. Onions:
 2. Apples/Pears:
 3. Pomegranate seeds:
 4. Brie cubes:
 5. Toasted Almonds:


Cut the puff pastry edges into 1-2-inch strips.
 Bring down the top and bottom edges and strips as shown:

Braid pastry strips in this way:
                                         
If you want a shiny top, brush with egg wash. We don't use it because at this point we just want to bake and eat the thing. Bake at 425 degrees F. for about 20 minutes. Cut in strips to serve.

Monday, February 18, 2013

Roasted Tomato Soup


If you love southwest-style soups, this one is amazing. We started making it last summer when my dad had a bumper crop of tomatoes and kept sharing with us. Remember that you might have to tweak ratios and cooking times because it's still a work in progress (as is pretty much every recipe we post here).

You'll need a large baking sheet, a soup pot, and a mixing bowl. Preheat the oven to about 350 degrees.

 
Start with ripe tomatoes (8-12, depending on size). a large onion, and 4-6 cloves of garlic. I suggest using all six of the garlic cloves. They'll be roasted so the flavor will be mild and less pungent. Alex thinks the small chunks of roasted garlic are the best part of the soup. You can add more if you really love garlic.
 Put a couple of tablespoons of extra-virgin olive oil in a large mixing bowl. Sprinkle it with salt and pepper. Then chop the onion into large chunks. You can do the same with the garlic, but we cut it smaller because I'm not a fan of large pieces of garlic in my food, roasted or not. If you like garlic, leave the chunks about this size:
 Put the chopped onion and garlic in the bowl with the salted/peppered oil. Chop the tomatoes into similar sized pieces and add them, as well
Mix the chopped ingredients with the oil so they're well-coated, and spread the mixture on a baking sheet coated with non-stick spray. Place the sheet in the oven. You can set the timer for about 30 minutes, but I honestly don't know how long it takes. We just roast everything until the onions are starting to caramelize, the tomatoes are wilted, and the garlic is soft.

While everything is roasting, rinse two cans of beans and add them to your soup pot. One can needs to be black beans, but we use a different kind of bean for the second can, just for color and variety. Also, Alex believes the white beans are magic (yes, he's an adult--he still thinks they're magic).
Add one can of diced mild chilies, or a can of jalapenos if you prefer spiciness. Aaron doesn't like spicy, so we use the chilies. Then measure out about a half cup of quinoa (I use a couple of handfuls), or you can use rice if you don't keep quinoa on hand. It does change the taste a bit and quinoa is healthier, so I recommend using the latter.
Fill the pot with four cups of vegetable broth and one cup of water. Stir in a teaspoon and a half of chili powder and a half teaspoon of cumin. If you love cumin, add more. Bring the liquid to a boil, cover, reduce heat and let the mixture simmer until the roasted ingredients are done.
This is what they look like. You can see that the tomatoes still hold their shape but the onions have started turning golden brown. This is actually a deceptive photo because the flash lightened the onions, but if you look toward the top of the photo, you can see some blackening. Hopefully that will convince you that these really are well-done. Yeah. We did that on purpose. You don't have to.

When the quinoa is cooked (the pearls will be sort of transparent and have the consistency of al dente pasta and it takes about 15 minutes), add the roasted tomatoes, garlic and onions. Allow the soup to simmer for another fifteen minutes, at least (we prefer 25 minutes).

We serve this with a sprinkle of cheese and warm cornbread. Be sure to scatter cornbread crumbs near your glass when  you serve it, especially if you plan to take a picture and post it on  your blog.

Sunday, February 17, 2013

Scottish Farmhouse Eggs

I'm starting this post with a caveat - This is not a healthy recipe. I'm sure it was created back when tractors were just horses hooked to ploughs and the calories were necessary because a back hoe was just a hoe at the end of a burly Scottish farmer's arms. I imagine it was originally made from freshly gathered eggs and cream, the leftover bread from dinner the night before, fresh cut herbs from the garden the farmer's wife lovingly grew, and whatever cheese they'd had on hand. Don't judge me. It's my imagination and I have a deep love of my concept of the old-timey Scottish countryside. But BE WARNED - if you make this, it will totally ruin whatever diet you happen to be on. That said, this is frickin' delicious. Here's what you need:
Just so you know what all's there, it's Half a loaf of Sourdough bread, a block of sharp english cheddar cheese, a carton of eggs, a bunch of chives, a carton of half&half, and some sausage. All in the beautiful cast iron skillet that the dish will ultimately be assembled in (if you ever have to choose between using a regular, non-cast-iron pan and using a cast-iron pan, use the cast iron pan). I know that many of you don't have cast iron pans, especially if you're not over the age of 25, so a regular baking dish will also work. Preheat the oven to 400 degrees Fahrenheit.
 
 Brown that sausage! (Note how the sausage is not browning in the cast-iron skillet - This is because we'll be assembling the rest of the dish as the sausage browns. Don't forget to stir the meat around every couple while you're assembling! Otherwise your sausage will burn!) I used sausage here, but you can use pretty much any breakfast meat - ham, bacon, canadian bacon, other kinds of sausage, steak? (probably not steak).
As the sausage browns, grease your pan. I rubbed the entire inside surface of my skillet with a stick of butter. Then, break up the sourdough bread into crouton-sized pieces until the bottom of the pan is well covered. (If any of you LDS readers were in the Aaronic priesthood, it's exactly the same as breaking the bread for the sacrament, but without any sacred implications. Just delicious ones)

Crack the eggs onto the bread crumbs. TRY not to break the yolks (as the above picture shows, I DID break a couple. It was delicious anyways. So breaking a yolk or two won't ruin it) The sausage is probably brown by this point, so take it off the heat and drain the grease if you can. I didn't. I used a slotted spoon to transfer the sausage directly from one pan to the other. But that comes later.
 
 Grate the cheese! I used about half the block.

 You know those kitchen shears that photo-bombed a few of my earlier photos? They were actually out for a reason. After you've rised the chives REALLY well, use the scissors to cut them over the egg-bread mix til it's got a fairly even smattering over the face of the whole dish (YES! I got to use the word smattering in a legitimate sentence!)
 
 Scatter that sausage evenly over the whole thing

Same with the cheese
 
This step gets kinda tricky. Pour the half&half slowly over the face of the dish. There's no set amount you're supposed to use, just enough that you can see it on the edge of the entire dish. If you use too little, the croutons will get too dry and the eggs will just be eggs. BUT IF YOU USE TOO MUCH the dish will be all slimy and mushy and that's way worse than too dry. trust your gut. If you overthink it you'll choke and mess up. Bake it for fifteen to twenty minutes for runny yolks, twenty to twenty seven minutes for firm. I went for firm yolks. DON'T OPEN THE OVEN! It'll make the dish collapse and it won't be as fluffy or delicious. And you're going to want to open the oven. the smell of it cooking will drive you mad. MAD!
PULL IT OUT OF THE OVEN BEFORE IT OVERCOOKS! Careful, it's HOT! Enjoy! This was a very large batch, because I was making it to be shared between 15 coworkers. But the beauty of the dish is that it can be scaled up or down depending on the party you're feeding, and the size of the dish/skillet you use.